Related Posts Plugin for WordPress, Blogger...
Showing posts with label 19-teens. Show all posts

Thursday, September 15, 2016

· 1910s Bathing Costume ·


One of my most-needed projects for this summer was a new swimsuit!  While I adore vintage style everyday and also rather like vintage swimwear, I'm just not comfortable sporting it.  Too little coverage to make me comfortable, plus I am pretty much the polar opposite of a "sun worshipper".  I don't love the way sunscreen feels, but I also hate getting burnt or tanned.  Consequently, I love garments that will cover my neck and shoulders when I'm likely to have sun exposure for a long period of time.  Enter: even older "vintage"!  The bathing costumes of the early 20th century really appeal to me, and I love having an excuse to go full-out, unabashedly sailor style!


I'm not super big on water activities, but even I have to admit that they *are* a natural part of life in the US and are mildly diverting. ;-)  I used to be super fond of swimming (and was quite good when I was young!), but I think it's one of those things that becomes more enjoyable when it's a habit.

All this to say that I have been sadly neglecting my own swimming attire for years...  My mom made me a really cute 1900s style bathing costume 12 years ago from this Folkwear pattern, and while it was a quite forgiving style for growing... it became obvious that I needed to accept the fact that something made when I was 13 years old was just really never going to work again. ;-)  I'm pretty good at procrastinating on projects and also pretty good at avoiding water sports.  Consequently I went several years without any swimsuit.  I think it's one of those things that, while you can manage without it, once you have the garment, you'll be using it a whole awful lot.  So I look forward to many more outings to put it to good use!

Blah, blah, blah... I talk/ramble/blather so much on this blog!  I think this is really just my way of getting a captive audience and getting out everything I could possibly want to say but usually am too inhibited by myself to do. ;-)  And besides, you can always skip to the photos if you don't give two hoots!


I changed the neckline to a shallow V and altered the collar accordingly.  I really wanted to do a wide, square neckline, but my desire for maximum sun coverage won out. ;-)

The buttons down the front are fully functioning to allow extra room for pulling it on.


The skirt is smooth at the front and pleated on the sides and back.


The back trim and sleeves were inspired by my very favorite image (from my Pinterest board), and I'm glad I finally got around to doing something with that inspiration since it's been rattling in my head for years!

I used both 1/2" and 3/8" ribbon on all the bodice/waistband areas.  It ended up being just subtly more pleasing than 2 rows of the same width and, bonus!, it turns out that I was able to completely use up both spools this way so it was some great stash-busting!


Speaking of stash-busting, the whole project accomplished that in spades!  The buttons are all from the stash, the fabric came from all the random bits we had leftover from 12 years ago.  It was the perfect amount- hooray!


I really adored the Folkwear pattern, but after wearing it a few times, we discovered how very inconvenient and unpractical having a jumpsuit with detachable skirt was for undressing/using the restroom.  The design was very clever, but it necessitated removing every article of clothing as well as undoing every button (there are 14) and untying the tie.  In short, it was a royal pain.  We've come up with a few ways of making other bathing suits more user-friendly, and this is our latest attempt.  I haven't put it to a rigorous test yet, but I do feel like it will be perfectly suitable. :-)

The dress is a one-piece with entirely separate bloomers and honestly, I'm not sure why I didn't think of it before- seems like an easy solution to the dilemma, haha!


 I also wanted to modernize my bathing costume a bit this time around- you know, bring it all the way up to the 1910s! ;-)  Shorter sleeves and a v-neckline instead of a jewel neckline were my biggest changes.  I drew lots of inspiration from my Pinterest board, and there are still so many ideas I'd love to use for another project!  I never found historical reference to buttons up the side, so those are (plausible, I flatter myself) artistic license but I'm a huge fan!

Also, the majority of bathing costumes I came across from the 1910s had longer bloomers and shorter skirts than mine.  I'm not entirely sold on that idea yet, so when I came across a few examples otherwise, I instantly claimed them as my justification. ;-)


Triple rows of ribbon for the skirt, again taken from extant photos.  I applied this trim before deciding on the trim for the rest, so of course now I'm second-guessing the placement and I really do think I should space them wider.  Sigh- to rip off, or not to rip off?  The struggle is real.


The bodice is quite roomy to allow for full range of motion, and it is taken in with inverted pleats in the front and back.


The side opens all the way into the armhole which makes for easy on-and-off, even when soaking wet.

Speaking of which, I made this bathing costume with taslan, which we've come to love for swimwear!  It's made from nylon, but is engineered to look and feel like cotton.  It's very comfortable, although I will admit that this particular batch of fabric is my favorite of all the others we've purchased since!  The glory of taslan is how quickly it completely dries off.  Upon first coming out of the water, it sheds massive amounts of water, and then it is easily wrung out a bit.  But after being in the sun for a few minutes the whole dress dries out and, depending on the humidity/sunshine levels, it can be completely dry in 15-20 minutes.  Score!  It also makes a perfect outfit for canoeing or anything involving "accidental" water.


· Photos by the ever-marvelous Kathryn who convinces me that, yes, getting in the boat is actually a really good idea for a photoshoot! I'd be so hopeless without you. ;-) ·

Wednesday, August 3, 2016

· Shoe sale! ·


· EDITED TO UPDATE ·

The shoes have been going fast, just 2 pairs left!

I've been posting quite a bit lately about my de-cluttering efforts and I'm far from done...  Up for sale this week are various shoes in sz 6.5-9.5.  We have a mix of vintage and historical styles- take a look!

All shoes will come shipped in shoes boxes.  Only styles specified will come with original box.

Shipping NOT included in any of these prices. Payment by PayPal, payment within 24 hrs of invoicing before passing to the next in line.

To Reserve:

- Email me at modedelis (at) gmail (dot) com
(comments for this post have been turned off- please only contact me by email!)
- Include your zip code and country
- Include the number/titles/letters (as applicable) of the items from the description

Remix "Carmen" brown crocodile shoes
sz 8.5, $45 + shipping

These show wear on the soles and have 2 scuffs on the back of the right heel, as shown.  They have cushions added in for comfier dancing!  There are a few flaws on the inside seam on the heels- shown in photos.  Great price on a wonderful reproduction brand!


Steve Madden "Trouser" Oxfords

SOLD


Let me know if you have any questions!

Again, To Reserve:

- Email me at modedelis (at) gmail (dot) com
(comments for this post have been turned off- please only contact me by email!)
- Include your zip code and country
- Include the number/titles/letters (as applicable) of the items from the description

Monday, October 19, 2015

· Pattern Pre-Sale! ·

For those who don't already follow me on instagram, you'll want to head on over and check out my pattern "pre-sale" going on right now!  I'm offering my latest batch of vintage patterns at a discount, so be sure to get them before they head to the shop!


Saturday, April 18, 2015

· More Shoes for Sale! ·


Hello, there! It's Kathryn, the girl behind most of the photographs on this blog and who occasionally shows up wearing some of Lily's fabulous creations. :-) I'm popping in today with the second installment in the "Shoes for Sale" series. I have a pair of dyeable white leather American Duchess "Astoria" Edwardian reproduction shoes for which I'd love to find a loving home! I could have posted this on my own blog, but Lily's readers are much more the sort to appreciate it!


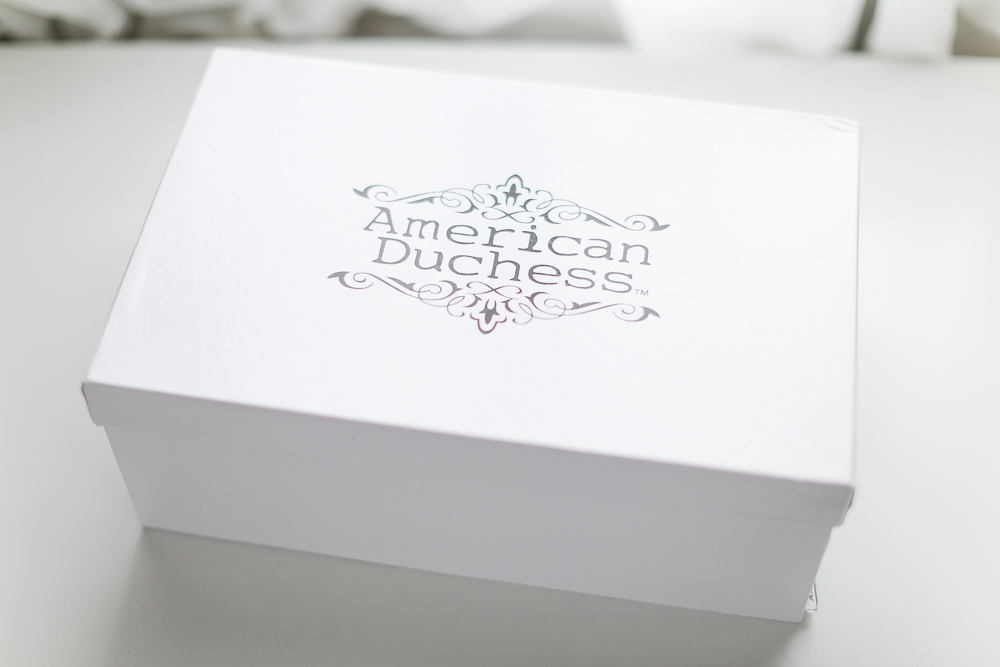
These shoes are new; they have been tried on and walked on indoors only (the soles do look a tiny bit speckly on that account). They are size 8.5, and they are the earlier version that have leather covered buttons instead of the crystal buttons that come on them now. Comes with the original box (which has endured a little bit of smashing about the corners, but is quite functional :-).


Perfect for Edwardian, Titanic, Downton Abbey, etc. impressions! And if you don't like them white, you can dye them any color you want!

· EDITED - Sold! ·


Saturday, March 8, 2014

·Titanic- Inspired Coat ·


I've never been terribly enamored with the costumes from James Cameron's "Titanic".  Well, except for Rose's Sinking Coat.

*sigh*  Sooo pretty.

4 winters ago I decided I wanted a bit of a challenge, so I set about to make my very own Titanic coat.  I scoured the internet for all the information there was available (which turned out to be quite a lot- including embroidery templates!!).  I came across evidence that the coat was later re-used in "Tuck Everlasting" where it was worn double-breasted.  Being a total sucker for anything double-breasted, I knew I had to do that! :-)

My favorite color at the time was pink so I loved the original coat!  However, I was concerned about the "practicality" of a pink coat, and was open to the idea of any other color.  One of our very favorite wool sources happened to be running a dirt-cheap sale on pale pink wool, though, so that was settled. :-)  In the end, I'm glad I went with it.  After all- does an embroidered dress coat really need to be a "practical" color?! ;-) 


As I mentioned before, the embroidery designs were from a site somewhere online, and happily were just the right size- no fiddling necessary!! :-)  And now that I'm searching around for all the sites I used for images, advice, etc.- I'm so glad I made the coat when I did!  Almost all the web rings are outdated now, and all but a few images are broken. :-(


I used soutache braid for the design, and stitched it into place.  The wool is slightly felted, and the weave was loose enough that I could insert the ends of the braid through it.

I traced the design onto tissue paper and basted that in place.  Then I stitched the braid on, through both the tissue and the wool.  The final step was tearing away the tissue, which involved many hours of painstakingly pulling out tiny shreds of tissue with tweezers!

The end of the soutache is firmly wrapped with tape, then inserted in the fabric with a tapestry needle.  Then once the end of the embroidery line is reached, the remainder is inserted with a tapestry needle and then the end taped and trimmed.  I wish I remember how many packages of soutache I ended up using!


I used Vogue 8346 since it was double-breasted, had vertical princess seams, and a shawl collar and just added cuffs.  It was at this point that I stopped worrying about making a 1910s coat.  I had lots of fabric, and I really loved the idea of a flared skirt on this coat.  Plus, I frequently wear full skirts, so "practically", I should have a pretty-princess coat. ;-)

Overall, this coat is still very Edwardian-inspired, so this fabulous "toque"-looking vintage hat and these Edwardian-inspired 80s shoes, seemed like the perfect accessories!


I loved having the excuse to buy these Edwardian-styled buttons!

And you can be shocked.  I resisted the oh-so-compelling urge to point out all the little issues and mistakes this coat has. *sigh*  Maybe someday I won't even feel the need to post disclaimers like this. :-P

· Photos by- yes, you guessed it!!- the wonderful Kathryn :-) ·

Saturday, November 2, 2013

Accessories Challenge · Purses


The theme for October's Accessorizing Head-to-Toe Challenge was Bags and Purses.  Read about last month's entry here!


October was a very busy month, sewing wise, due to Reformation Day (posts about our outfits will be up later this month!) so I wanted to keep this month's "Accessories Challenge" small and quick.  It was just the impetus I needed to finally make a purse for this frame that I bought 5 years ago. :-)  A quick trip to Pinterest, and I had the inspiration I needed. ;-) ( I love that site so much!)  Since the design on the frame is fairly "Art Nouveau", I wanted a purse that fit into an early 1900s theme. 

I did have to put away my grand thoughts of a microbeaded purse after I remembered the "quick" part, though.... ;-)

See?  How can you not want this??  And surely I'd be able to acquire the requisite skills and proficiency to make this in 2 weeks, right? ;-)

I looked through our stash for fabrics to use, and came across scraps of this velvet, leftover from a different project.  I found several velvet purses from the early 1900s, so after deciding on a shape, it became clear that I needed some embroidery to spruce it up a bit. :-)  I was quite pleased to find that we also had enough pieces of various coordinating colors of silk ribbon for the embroidery, so that was an easy choice!

It has been awhile since I've done ribbon embroidery, and I'm not sure why I haven't found more excuses to use it!  I am always amazed by how good it looks with so little effort and time!  Very gratifying. :-)

The lining was left over from my silk 1950s dress and turned out to be a great match. :-)
The one aspect that paralyzed me with this project was attaching it to the frame!  I tried to find some tutorials online, but was unsuccessful in finding one for my style of frame.  It has a few small holes around the edge, so I just finished off the edges of the purse and then sewed it on through the holes.  The end result is passable, but I'm still not convinced it's as good as it could be.  So if anyone has any tips, I'd love to hear them! ;-)

All in all, I'm very pleased with the result and I'm sure it will get plenty of use! :-)

Historical Period:  Inspired by purses from the early 1900s

The Accessory:  Ribbon-Embroidered Velvet Purse
Outfit It Accessorizes:  None specifically
Materials Used:  Velvet, lining, silk ribbon for embroidery, and metal frame and chain- all from the stash, Hooray!
Techniques Used:  Ribbon Embroidery, Sewing

Saturday, August 10, 2013

Past Projects · Titanic Evening Gown


With the anniversary of the Titanic last year, our dear friends the Yens hosted a ball as an excuse to make 1912 evening gowns.  So we obliged. :-)  My inspiration came from "Costume in Detail", one of my very favoritest books!!  I have always loved the 1911 evening gown, and this seemed like the ideal time to make it.  I was slightly limited, design-wise due to my desire to utilize my extensive stash collection.  I was rather pleased with the outcome, though- due to stocking up on fabrics during super-clearances and then putting them in the stash, I was able to make this dress for less than $25- all supplies included!  It's projects like this that make me feel like my attempts at using up the stash are futile- there are just so many benefits to having it!  The dress has a fitted, boned lining and the top fabric is draped in place over it (thanks to my wonderful mother!).  The sleeves and neckline are trimmed with a row of tiny beads.  The necklace was made with various jewelry findings from Hobby Lobby and JoAnns.


The back train buttons up for ease in dancing.  A close-up of the back skirt pleats.
I'll let you in on a secret about my fabric stash.  I have so many great stories about how "I had just the fabric I needed!" or "This project was so inexpensive!", but in reality, dark secrets lurk inside those Rubbermaid tubs in the closet....  This fabric would be one of those.  Yes, I love the fabric, yes, it was a GREAT price, but the plain truth is that when you're confronted with silk at $2-6/yd, you rarely know exactly how much to buy.  Case in point- I have 5 1/8 yds of this fabric left, and I have NO clue what I'll ever use it for.  It's just not terribly versatile for multiple eras.  But, it shall lurk on.... hoping to one day be the answer to another of my pressing "needs". ;-)
Photos by Kathryn and Laura
 

Copyright © 2013 Mode de Lis . All rights reserved. | Designed by PrairieRoseDesigns.com